In the digital age, capturing screenshots has become an essential skill, allowing us to preserve valuable information and share visual content effortlessly. With Windows being the most widely used operating system, mastering the art of taking screenshots on Windows is crucial for both casual users and professionals alike.
This comprehensive guide will empower you with all the necessary knowledge and techniques to effortlessly take screenshots on your Windows device, ensuring you can capture and share your digital experiences with ease.
How to Take a Screenshot on Windows

Taking a screenshot is a great way to capture an image of your screen, whether it’s a website, a document, or an error message. Windows offers several different ways to take a screenshot, so you can choose the one that’s most convenient for you.
Use the PrtScn Key
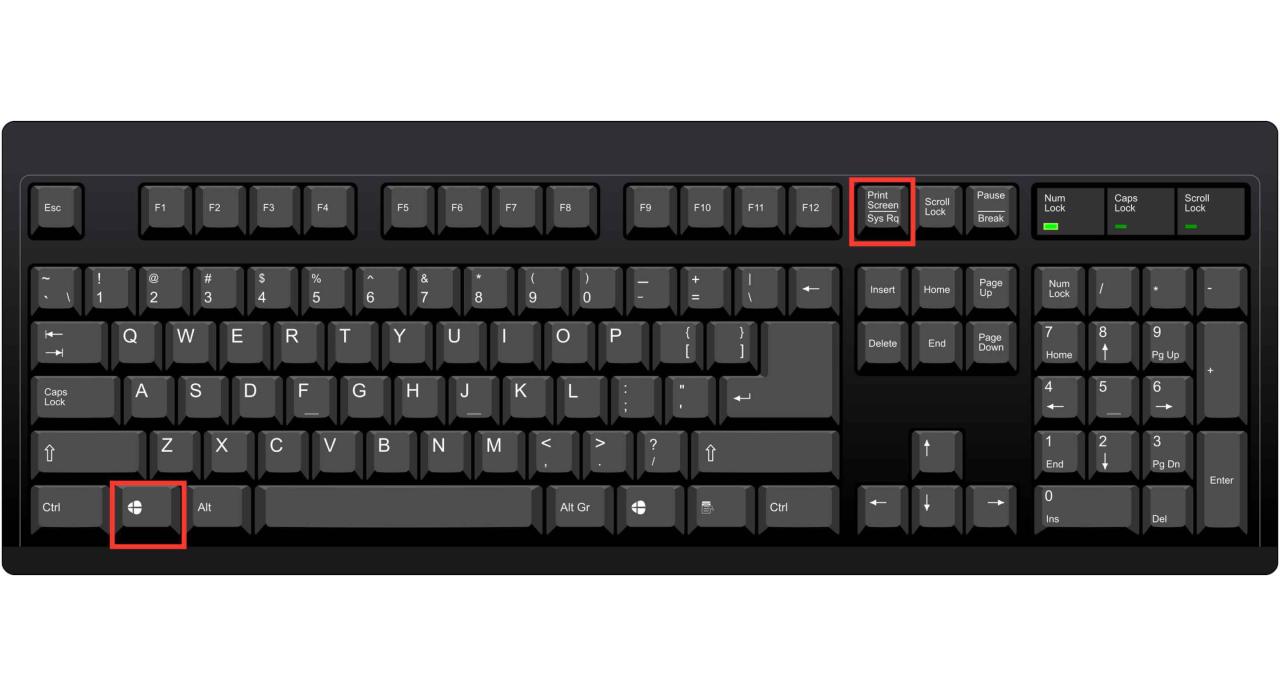
The most basic way to take a screenshot is to use the PrtScn (Print Screen) key on your keyboard. Pressing this key will capture an image of your entire screen and copy it to the clipboard.
To paste the screenshot into a document or image editor, simply open the program and press Ctrl+V (Windows) or Command+V (Mac).
Use the Snipping Tool
The Snipping Tool is a more versatile tool for taking screenshots. It allows you to capture a screenshot of a specific area of your screen, rather than the entire screen.
To use the Snipping Tool, open the Start menu and type “Snipping Tool”. Click on the Snipping Tool icon to open the program.
Once the Snipping Tool is open, click on the New button to start a new screenshot. You can then use your mouse to drag a box around the area of the screen you want to capture.
When you release the mouse button, the screenshot will be captured and saved to the clipboard.
Use the Xbox Game Bar
The Xbox Game Bar is a feature that was originally designed for gamers, but it can also be used to take screenshots.
To use the Xbox Game Bar, press the Windows key + G. This will open the Game Bar. Click on the Screenshot button to take a screenshot of the entire screen, or click on the Record button to record a video of your screen.
The screenshot will be saved to your Pictures folder.
Customizing Screenshot Options
Windows provides a range of options to customize your screenshot experience, allowing you to tailor it to your specific needs.
To access these options, open the Settings app and navigate to the “System” category. Click on the “Display” tab and scroll down to the “Advanced display settings” section.
Under the “Capture” heading, you will find several options for customizing your screenshots:
- Save screenshots to: Choose the default save location for your screenshots.
- Use PrtScn to open screen snipping: Enable this option to open the Snipping Tool when you press the PrtScn key.
- Use the print screen shortcut to capture active windows only: Capture only the active window instead of the entire screen when you press Alt+PrtScn.
Troubleshooting Screenshot Issues
If you encounter any issues while taking screenshots on Windows, there are a few steps you can take to troubleshoot the problem:
Check your keyboard: Ensure that the PrtScn key on your keyboard is functioning correctly by testing it in other applications.
Make sure the Snipping Tool is up to date: Open the Microsoft Store and check if there are any updates available for the Snipping Tool.
Disable antivirus software: Antivirus software can sometimes interfere with screenshot functionality. Temporarily disable your antivirus software and try taking a screenshot again.
Contact Microsoft support: If you are still having problems taking screenshots, contact Microsoft support for further assistance.
Tips and Tricks for Enhanced Screenshots
Here are some additional tips and tricks to help you capture even better screenshots:
- Use the Snipping Tool’s delay feature: Set a delay in the Snipping Tool to capture screenshots of menus and pop-ups that may disappear quickly.
- Capture a scrolling window: Use the “Capture a scrolling window” mode in the Snipping Tool to capture a screenshot of a long window or document.
- Annotate your screenshots: Use the tools in the Snipping Tool to add annotations, arrows, and highlights to your screenshots.
- Take screenshots on remote desktops: Use the “Remote Desktop Connection” utility to take screenshots of remote desktops.
- Utilize third-party screenshot tools: Explore third-party screenshot tools that offer advanced features and customization options.
